Hail storms don’t just pass through they leave decisions behind. Expensive ones. And if you don’t control the narrative early, your insurance company will. That’s exactly why learning How to Document Hail Damage for an Insurance Claim is critical. Not helpful. Not optional. Critical. It’s the difference between a partial payout and a full financial recovery. In Pasadena, where sudden storms can cause widespread but uneven damage, homeowners who document early and thoroughly consistently outperform those who don’t. This guide walks you through the exact system that works.
Why Documentation Is the Most Important Step in a Hail Claim
Insurance companies operate on evidence. Not assumptions. Not verbal descriptions. Evidence. You may have legitimate damage. You may even have a contractor telling you that your roof needs replacement. But if your documentation is weak, your claim is weak.
Here’s what strong documentation accomplishes:
- Establishes proof of damage
- Links that damage to a specific storm event
- Justifies the scope and cost of repairs
Miss one of these, and you lose leverage. And without leverage, negotiations get one-sided fast.
I’ve seen homeowners with obvious damage walk away with low payouts simply because they didn’t document it properly. On the flip side, well-documented claims tend to move faster, face less resistance, and result in better outcomes.
Understanding Hail Damage: What You’re Actually Looking For
Not all hail damage is dramatic. In fact, most of it is subtle. That’s where mistakes happen.
Types of Hail Damage
- Functional Damage
This affects the integrity of your roof. It allows water intrusion or accelerates deterioration. This is what insurance typically covers. - Cosmetic Damage
Surface-level marks that don’t impact performance. These are often denied.
How Different Materials React
| Roofing Material | Common Hail Damage Indicators |
| Asphalt Shingles | Granule loss, bruising, exposed matting |
| Metal Roofing | Visible dents and impact depressions |
| Tile Roofing | Cracks, fractures, chipped edges |
| Soft Metals | Dents on vents, flashing, and gutters |
Here’s something most homeowners don’t realize: soft metal damage often becomes your strongest evidence. It clearly shows impact force and direction, making it easier to validate your claim.
When to Start Documenting Hail Damage
Immediately. Timing matters more than most people think. The longer you wait, the more variables enter the equation sun exposure, rain, foot traffic, and general wear can blur the line between storm damage and pre-existing conditions.
Signs You Should Start Documenting Right Away
- Hailstones larger than a quarter
- Loud, high-impact storm noise
- Visible debris after the storm
- Reports of damage in your neighborhood
Even if you’re unsure, start documenting. You’re not committing to a claim you’re preserving evidence.
Step-by-Step: How to Document Hail Damage for an Insurance Claim
This is where execution matters. Follow this process carefully.
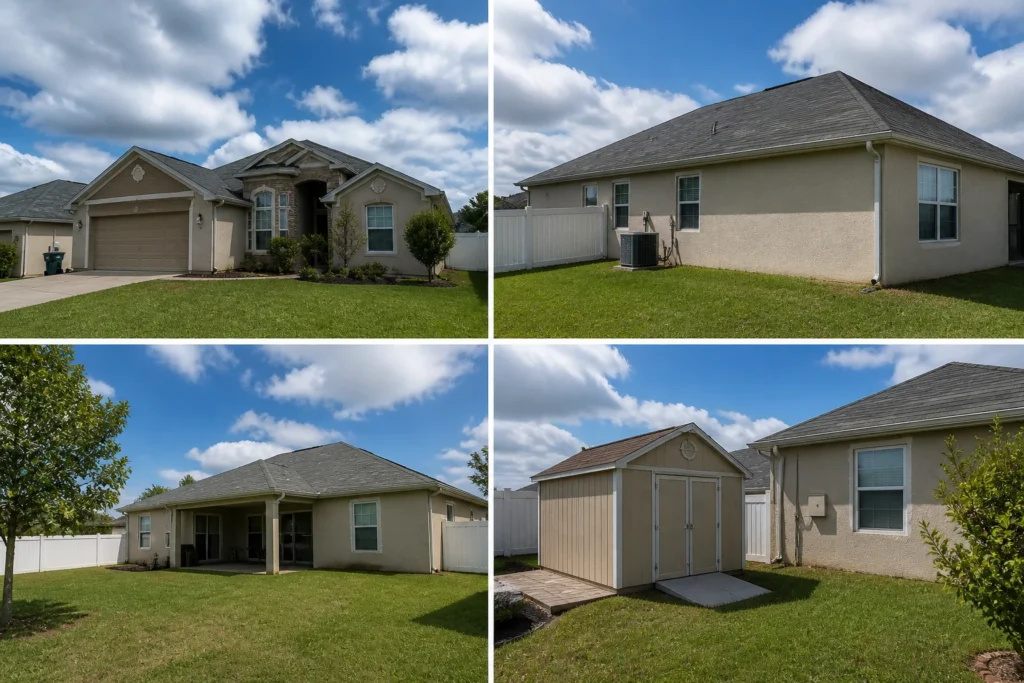
Step 1: Capture Wide-Angle Property Photos
Start broad.
Take photos of:
- All sides of your home
- Rooflines from different angles
- Surrounding structures like fences and sheds
These images establish context. They show the overall condition of your property and help validate that damage occurred during a specific timeframe.
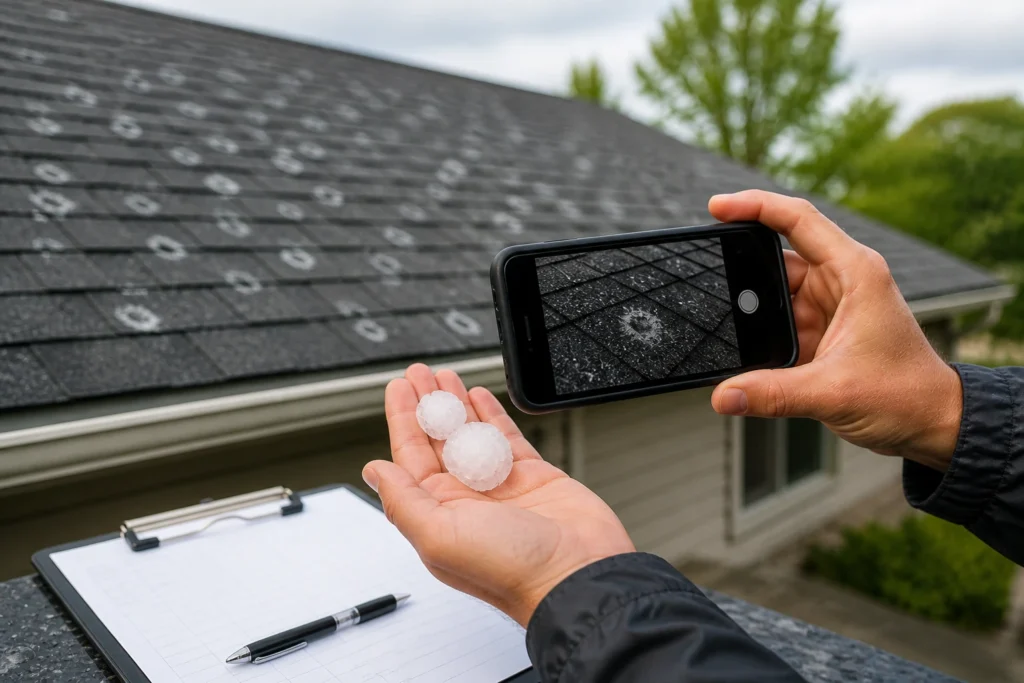
Step 2: Take Detailed Roof Damage Photos
Now go closer.
Focus on:
- Circular impact marks
- Areas with missing granules
- Discolored or soft spots
Take multiple shots per area. Change angles. Use natural light. If needed, lightly mark suspected impacts with chalk so they stand out. This is a critical part of How to Document Hail Damage for an Insurance Claim clarity determines credibility.
Step 3: Document Soft Metal Components
This is your strongest supporting evidence.
Photograph:
- Gutters
- Downspouts
- Roof vents
- Flashing
Why it matters: Metal doesn’t “hide” damage the way shingles can. Dents are visible and measurable. They tell a story and that story supports your claim.
Step 4: Inspect and Document Interior Damage
Damage doesn’t stop at the roof.
Check inside your home for:
- Ceiling stains
- Moisture spots
- Peeling paint
- Attic insulation issues
Interior damage connects the dots. It shows that the roof issue has consequences, which strengthens your claim significantly.
Step 5: Record Video Walkthroughs
Video adds context that photos can’t.
Walk your property and narrate:
- Where damage is located
- What you’re observing
- Any patterns you notice
Keep it simple. You’re not producing a film you’re documenting reality.
Step 6: Create a Written Damage Log
Don’t rely on memory.
Write down:
- Date of the storm
- Time (approximate is fine)
- Areas impacted
- Type of damage observed
This written log reinforces your visual evidence. It shows organization and consistency.
Tools That Make Documentation Easier

You don’t need a professional setup. But the right tools help.
Essential Tools
- Smartphone with a high-quality camera
- Chalk for marking impact points
- Tape measure for scale
- Flashlight for attic inspections
Optional Tools
- Drone for aerial views
- Moisture meter for interior damage
Quick Tips for Better Documentation
- Use natural daylight whenever possible
- Take more photos than you think you need
- Avoid blurry or poorly framed shots
Remember, when learning How to Document Hail Damage for an Insurance Claim, your goal is simple: make the damage undeniable.
Common Documentation Mistakes That Hurt Your Claim
Let’s talk about what not to do.
Frequent Mistakes
- Taking too few photos
- Ignoring certain roof slopes
- Skipping soft metal documentation
- Using poor lighting
- Waiting days or weeks to start
These mistakes weaken your claim immediately. And once doubt is introduced, it’s difficult to recover.
How Insurance Adjusters Evaluate Your Documentation
Understanding this changes everything.
Adjusters are trained to look for:
- Evidence of recent damage
- Consistency across materials
- Signs of wear vs storm impact
If your documentation clearly shows storm-related damage, your claim becomes easier to approve.
If it’s unclear? Expect pushback.
Organizing Your Evidence for Maximum Impact
Documentation is only as strong as its presentation.
Recommended Organization System
- Folder 1: Roof photos
- Folder 2: Metal damage
- Folder 3: Interior damage
- Folder 4: Videos
- Folder 5: Written report
Label files clearly. Keep everything structured. Organization signals professionalism. And that influences how seriously your claim is taken.
What to Do If Your Documentation Isn’t Strong Enough
It happens.
Maybe you missed something. Maybe your photos weren’t clear.
Here’s how to recover:
- Take additional photos
- Request a reinspection
- Add more detailed notes
Documentation isn’t static. You can improve it even after the initial submission.
The Role of a Public Adjuster in Documentation
Sometimes, bringing in an expert makes sense.
Public adjusters:
- Document damage in greater detail
- Use specialized tools and methods
- Build stronger, more defensible claims
In Pasadena, homeowners often seek help when:
- Claims are underpaid
- Damage is disputed
- The process becomes overwhelming
It’s not required but it can significantly improve outcomes.
Real-World Comparison: Weak vs Strong Documentation
Let’s break it down.
Weak Documentation
- 15–20 photos
- Limited roof coverage
- No interior inspection
Outcome: Reduced payout, possible denial
Strong Documentation
- 50+ detailed photos
- Full property coverage
- Interior and exterior evidence
- Video documentation
Outcome: Higher settlement, smoother process
The difference is effort. And strategy.
Advanced Documentation Strategies Most Homeowners Miss
This is where you gain an edge.
Advanced Techniques
- Slope-by-slope analysis
Treat each roof section as its own area - Collateral damage tracking
Inspect AC units, fences, siding - Pattern recognition
Show consistent damage across surfaces - Measurement documentation
Use a tape measure to show dent size
These strategies elevate your claim from basic to compelling.
Local Insight: Why Documentation Matters More in Pasadena
In Pasadena, environmental factors increase the risk of hidden damage.
You’re dealing with:
- Asphalt-heavy roofing systems
- High humidity levels
- Wind-driven hail impact patterns
These conditions make thorough documentation even more important. Surface-level inspections often miss critical damage. That’s why understanding How to Document Hail Damage for an Insurance Claim is especially important in this region.
If you’re also exploring broader strategies, topics like Hail Damage Roof Insurance Claim: How to Protect Your Roof can help you think beyond documentation and into long-term protection.
Going Deeper: How to Strengthen Your Claim Even Further
If you want to go beyond basic documentation, here’s how.
Create a Timeline
Document:
- When the storm occurred
- When damage was first noticed
- When photos were taken
This timeline eliminates confusion and reinforces your claim.
Cross-Reference Damage
If your neighbor has visible damage, document similarities.
- Similar roof orientation
- Same hail direction
- Comparable damage patterns
This adds credibility. Storms don’t hit one house they hit entire areas.
Understand Impact Physics (Briefly)
Hail damage isn’t random. It follows predictable patterns based on energy transfer. Concepts like Coefficient of restitution help explain how impact force affects materials differently. While you don’t need to master the science, understanding that force varies by surface helps explain why metal dents more visibly than shingles.
Final Checklist: Your Complete Documentation System
Before filing your claim, make sure you have everything.
Checklist
- Wide-angle property photos
- Close-up roof damage images
- Soft metal documentation
- Interior inspection photos
- Video walkthrough
- Written damage report
- Organized file structure
If you have all of this, you’re in a strong position.
Conclusion: Documentation Determines Your Outcome
Here’s the reality. Insurance claims aren’t just about damage. They’re about proof. Clear, organized, undeniable proof. The homeowners who succeed aren’t lucky they’re prepared. They understand How to Document Hail Damage for an Insurance Claim, and they execute it properly.
In Pasadena, where storms can cause widespread but uneven damage, this preparation matters even more. Take control early. Document everything. Stay organized. And put yourself in the best possible position before the claim process even begins. Because once the adjuster arrives, the story is already written.
FAQs
You should document damage as soon as it’s safe, ideally within 24–48 hours to preserve accurate evidence.
Close-up roof damage and soft metal dents are critical, as they clearly show hail impact.
Yes, but weak or missing documentation significantly increases the chances of a reduced payout or denial.
No, a smartphone with a good camera is enough if you take clear, well-lit, and detailed photos.
Take as many as needed to fully cover all areas most strong claims include 50+ photos.
Yes, interior signs like leaks or stains help prove the roof damage is affecting your home.
You can still document damage later, but it may be harder to prove it was caused by a specific storm.
Yes, your documentation can support your claim and influence the adjuster’s evaluation.
Yes, you can add more photos, notes, or evidence during the claim process.
Consider hiring one if your claim is denied, underpaid, or if you’re unsure how to properly document damage.